Rollator LED Front Light 1600 Lumen with Battery Pack

Improve your rollator with the powerful 1600 Lumen LED head light, designed to light up your path.

SKU: 11-90-033
Stock Status: In Stock
Delivery Status: 3-5 working days
£76 with VAT relief
(£91.20 incl. VAT)
VAT exemption allows chronically sick or disabled people to buy eligible items at 0% rather than 20% VAT.  More info
pcs

Rollator LED Front Light 1600 Lumen with Rechargeable Battery Pack

Purpose:         To see
Light power:   1600 Lumen

Enhance your rollator with the powerful 1600 Lumen LED Headlight, designed to light your path precisely and efficiently. Equipped with an advanced anti-glare lens design, this headlight ensures maximum visibility without causing discomfort to others. Whether navigating in low-light conditions or complete darkness, its multiple lighting modes (25%, 50%, 100%, and flash) allow you to adjust brightness according to your needs.

This high-performance light features 2 Samsung LH351D LEDs, delivering up to 1600 lumens while operating within a 5V to 15V DC voltage range. It also includes a built-in thermostat chip that prevents overheating, ensuring safe and consistent performance.

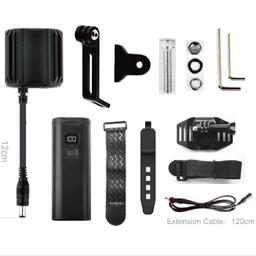
Accessories include an GoPro bracket, an aluminum light holder, and all necessary nuts and screws for easy installation. With a generous 130cm cable length and an IP65 waterproof rating, this headlight is built to handle outdoor conditions confidently.

Illuminate your journey with this durable, high-lumen headlight, and enjoy enhanced safety on every adventure.

Max power: 1600 Lumen
Voltage: 5V-15V DC
LED type: 2*Samsung LH351D LED
Mode: 25%-50%-100%-flash
Accessories: GoPro bracket + Aluminum light holder and nuts and screws
Cable length: 130CM
Waterproof level: IP65
Battery pack: 7.4V/5000mAh 37Wh waterproof with digital power display
Shipping Procedure: UN3481 - Lithium-ion batteries in compliance with Section II of PI966”.
Steady modes (one click): 25%(400LM, 14h) / 50%(800LM, 7h) /100% (1600LM, 3.5h)
Power Indicator: When the input voltage is less than 6.5V, the power indicator shows red. But, it doesn't mean your battery is low voltage if the input voltage for the light is set to 6V or less.

User Guides

The documentation for this product includes the manuals and instructions listed below. You can choose to view the documentation online or download it for local use.

1600 Lumen Trionic LED Front Light with Battery Pack

This manual both shows how you attach the light holder and the light on a Walker (left column below) and also how you attach them on a Veloped (right column below).

In the left-hand photo, A shows the holder attachment parts for a Walker (2 screws + 2 washers). B shows the holder attachment parts for a Veloped (1 screw + 1 knurled nut + 1 nut).

1600 Lumen Trionic LED Front Light with Battery Pack

Attaching the Light Holder

Instructions for a Walker
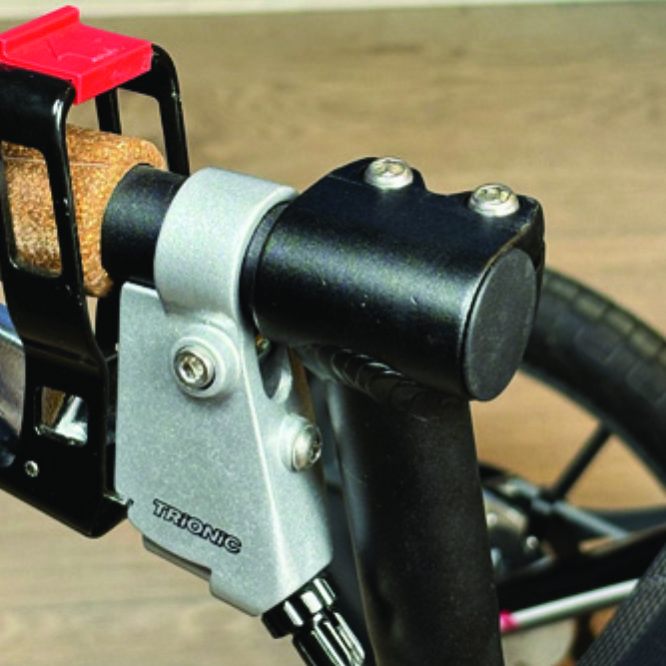
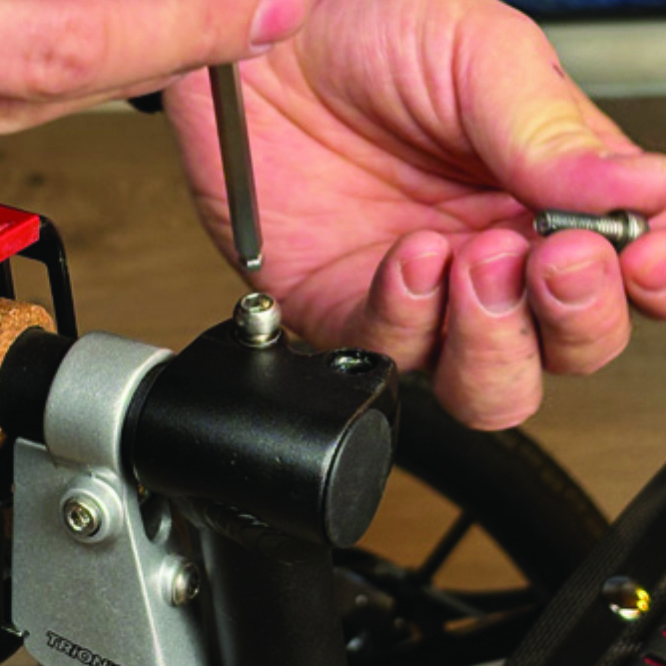
On top of the black semi-vertical tube, locate the two screws that clamp the grip tube, situated in front of the brake lever.
A1. On top of the black semi-vertical tube, locate the two screws that clamp the grip tube, situated in front of the brake lever.
Loosen both screws with the 5mm allen key included with the LED light.
A2. Loosen both screws with the 5mm allen key included with the LED light.
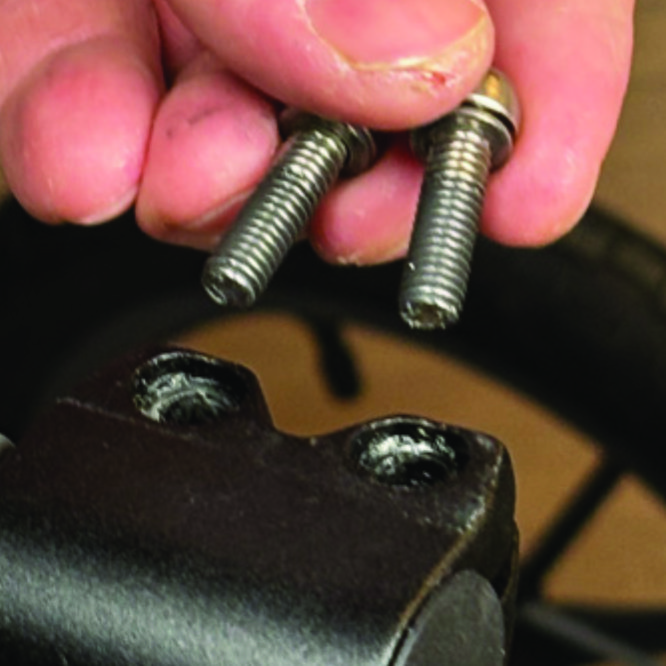
Remove the two screws from the grip clamp.
A3. Remove the two screws from the grip clamp.
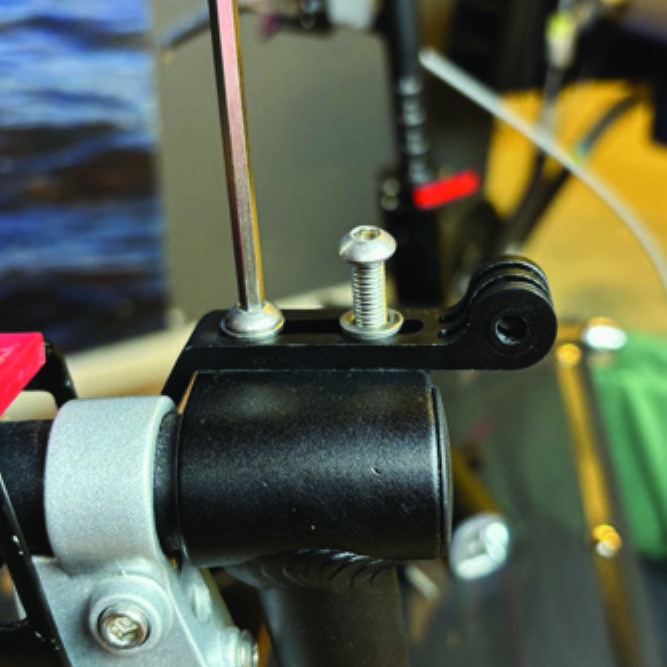
Place the light holder on top of the grip clamp, with its circular and slotted light attachment pointing forwards and upwards. Enter the two screws with washers into the holes of the clamp.
A4. Place the light holder on top of the grip clamp, with its circular and slotted light attachment pointing forwards and upwards. Enter the two screws with washers into the holes of the clamp.
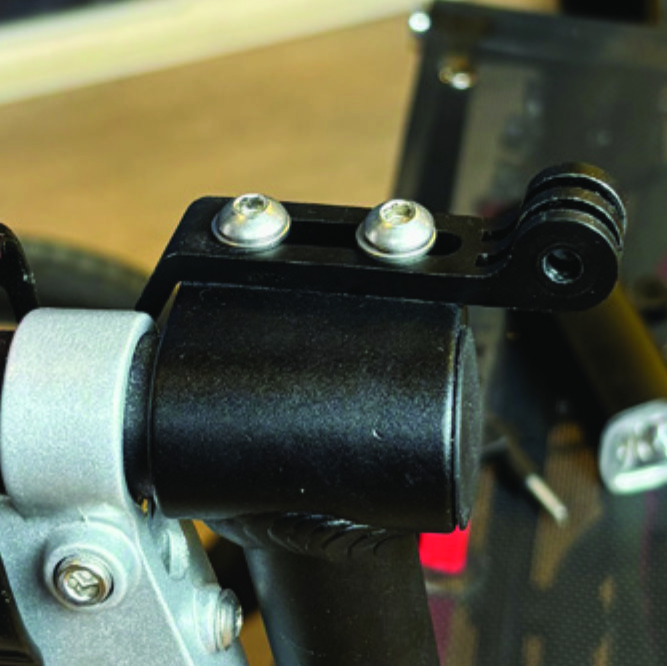
Tighten the two screws with the 5mm allen key. NOTE: It is important that you tighten the screws properly as they secure the grip tube with its rubber grip and brake lever.
A5. Tighten the two screws with the 5mm allen key. NOTE: It is important that you tighten the screws properly as they secure the grip tube with its rubber grip and brake lever.

Instructions for a Veloped

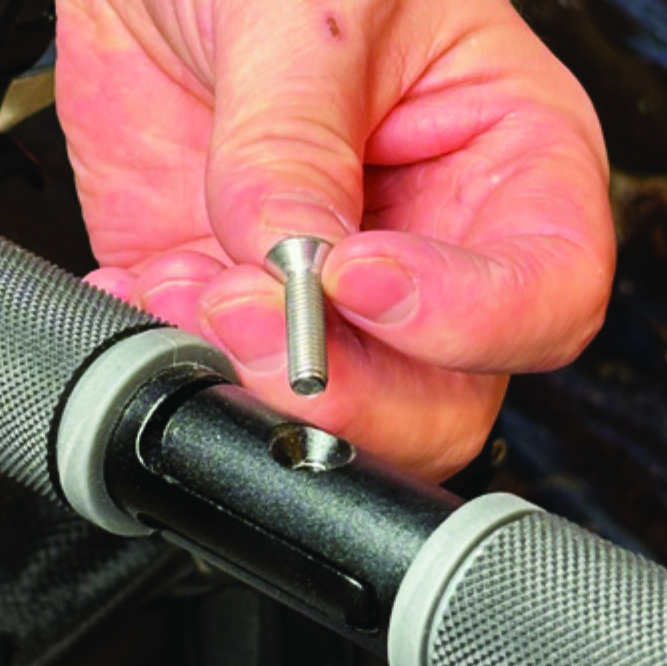
Locate the screw at the center folding hinge of the U-shaped grip bar of the Veloped. Unscrew the screw with the included 4mm allen key and remove it.
A1. Locate the screw at the center folding hinge of the U-shaped grip bar of the Veloped. Unscrew the screw with the included 4mm allen key and remove it.
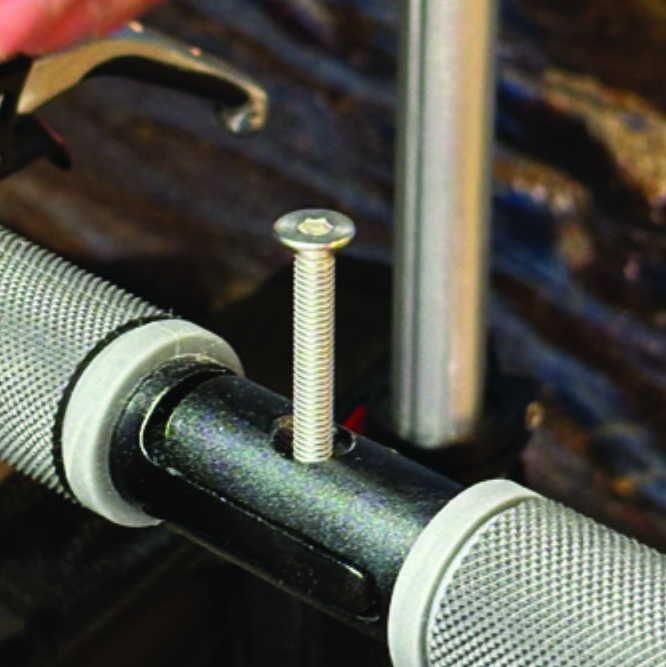
Replace the old screw with the longer screw included with the LED light. Attach the longer screw to the hinge and tighten it with the 4mm allen key.
B2. Replace the old screw with the longer screw included with the LED light. Attach the longer screw to the hinge and tighten it with the 4mm allen key.
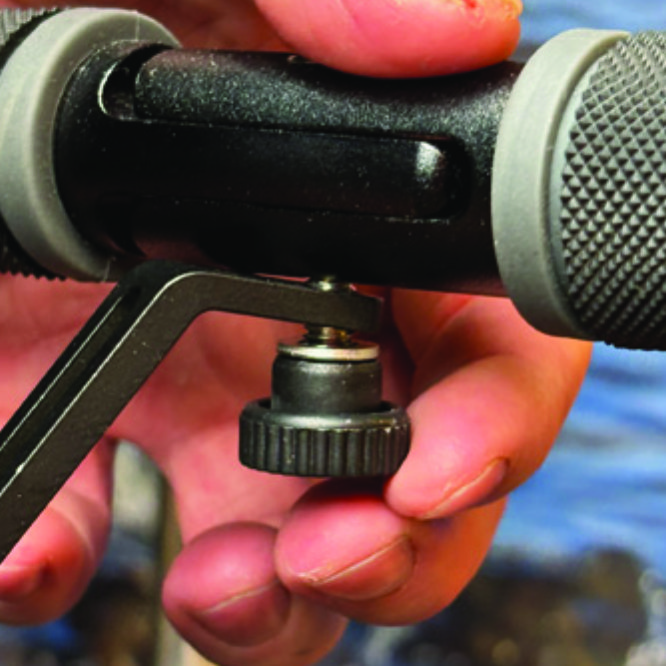
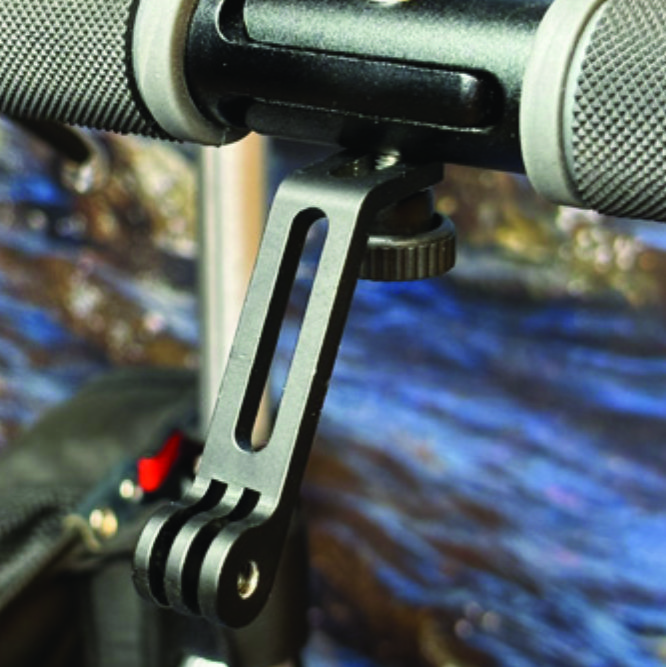
Attach the short angled end of the light holder to the lower end of the screw, on the downside of the grip bar. Fasten the holder with one washer and the knurled nut.
B3. Attach the short angled end of the light holder to the lower end of the screw, on the downside of the grip bar. Fasten the holder with one washer and the knurled nut.
For a more secure holder attachment, avoiding the holder to unintentionally turn sideways, replace the knurled nut with the included stainless steel nut and tighten it with a 10mm spanner.
B4. For a more secure holder attachment, avoiding the holder to unintentionally turn sideways, replace the knurled nut with the included stainless steel nut and tighten it with a 10mm spanner.
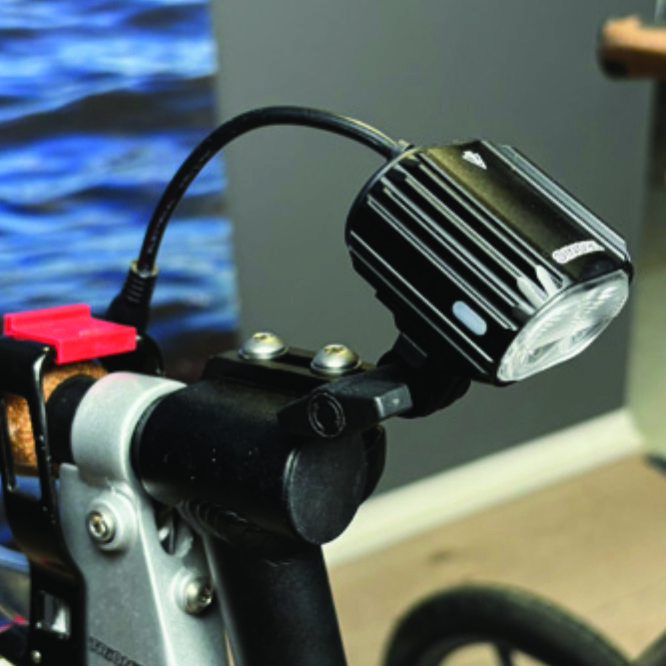
This photo shows the light holder as correctly attached.
B5. This photo shows the light holder as correctly attached.

Attaching the LED Light to the Holder

Instructions for a Walker
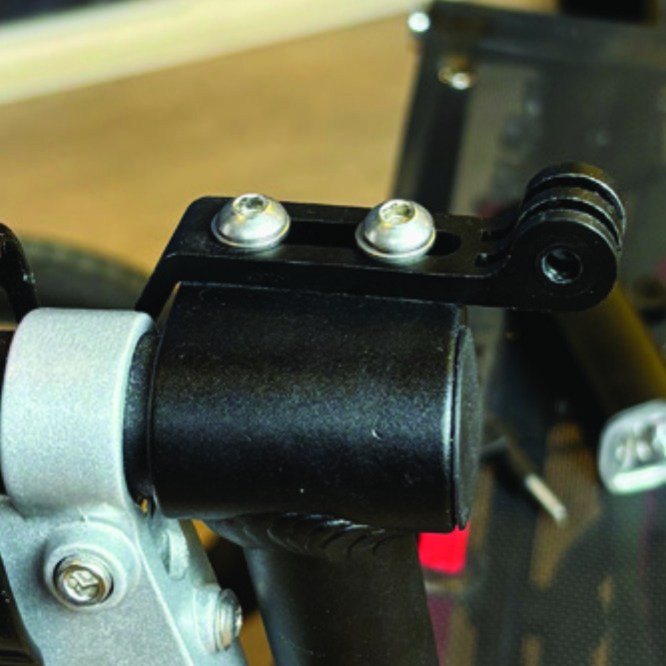
Identify the circular front end of the light holder, with two slots for attaching the light.
A6. Identify the circular front end of the light holder, with two slots for attaching the light.
Push the slotted bracket of the light into the slots of the holder and make sure they are aligned. Seen in the traveling direction of the Walker, enter the included wingnut from the left and tighten it.
A7. Push the slotted bracket of the light into the slots of the holder and make sure they are aligned. Seen in the traveling direction of the Walker, enter the included wingnut from the left and tighten it.

Instructions for a Veloped

Locate the screw at the center folding hinge of the U-shaped grip bar of the Veloped. Unscrew the screw with the included 4mm allen key and remove it.
B6. Locate the screw at the center folding hinge of the U-shaped grip bar of the Veloped. Unscrew the screw with the included 4mm allen key and remove it.
Identify the circular front end of the light holder, with two slots for attaching the light.
B7. Identify the circular front end of the light holder, with two slots for attaching the light.

Placing the Battery Pack

Instructions for a Walker
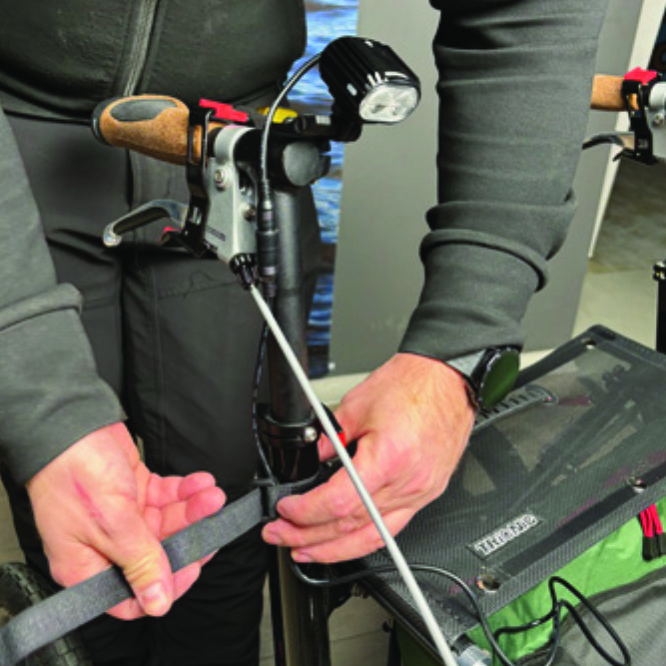
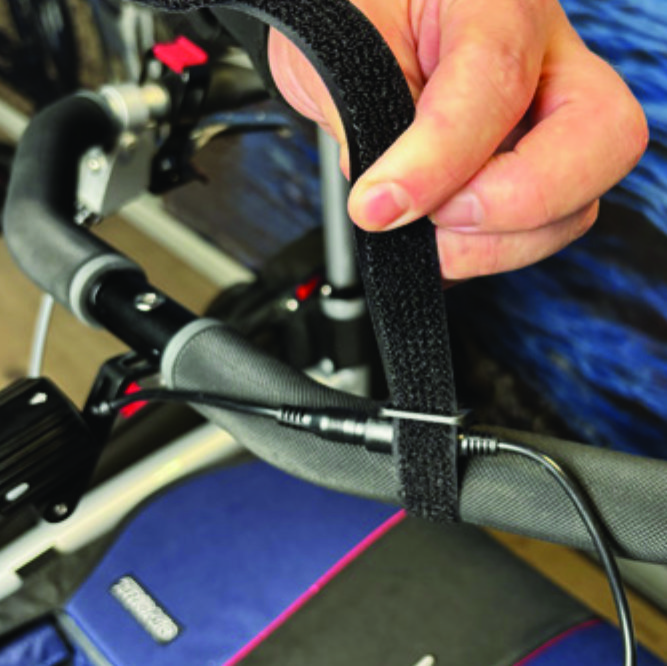
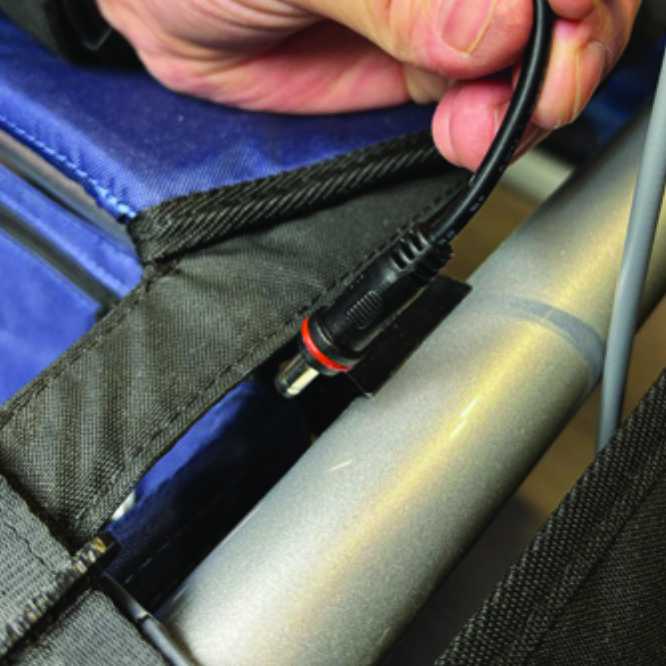
Run the longer extension cable along the semi-vertical grip tube of the Walker and secure it with the included velcro strap.
A8. Run the longer extension cable along the semi-vertical grip tube of the Walker and secure it with the included velcro strap.
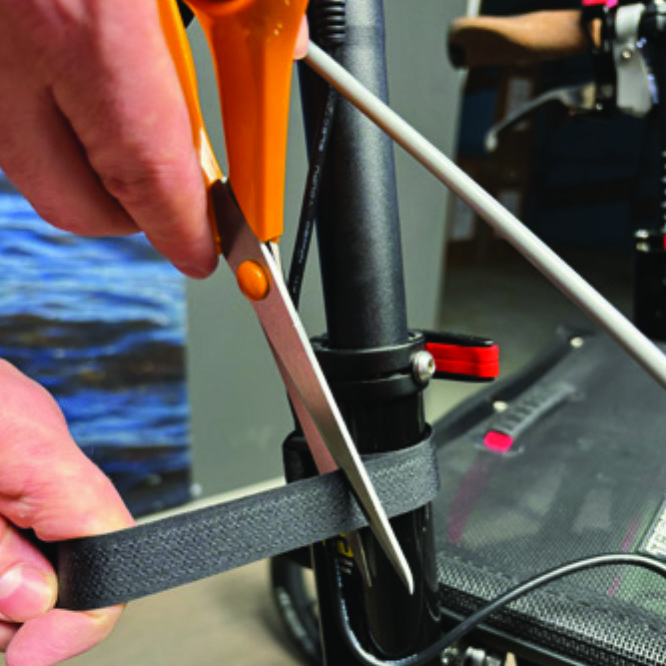
You can cut the excessive length of the velcro strap with a pair of scissors.
A9. You can cut the excessive length of the velcro strap with a pair of scissors.
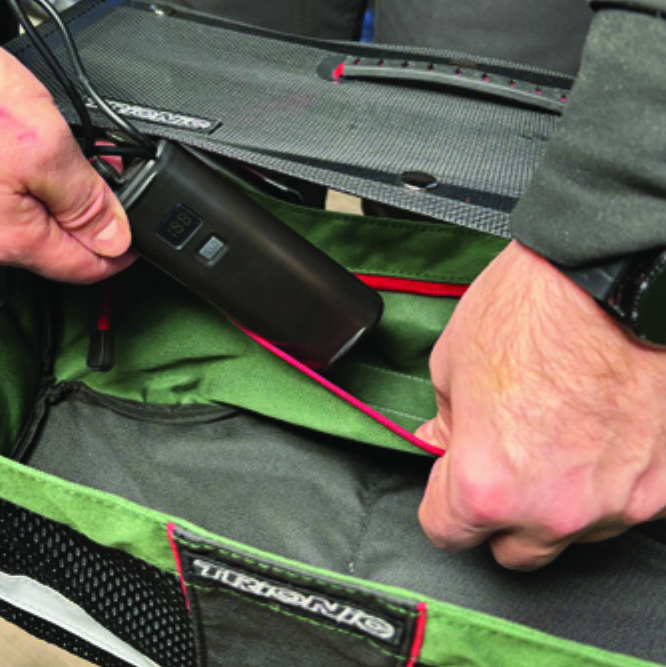
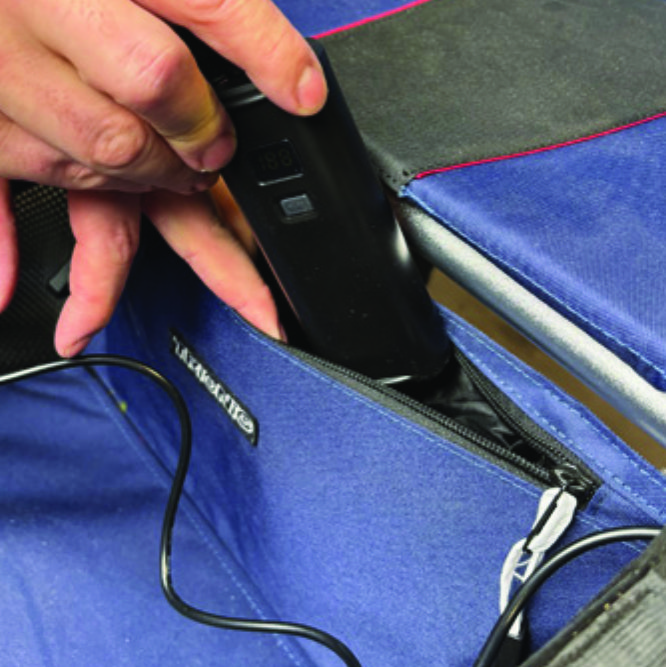
Place the battery pack in the rear zippered pocket of the basket.
A10. Place the battery pack in the rear zippered pocket of the basket.

Instructions for a Veloped

Run the longer extension cable along the U-shaped grip bar of the Veloped and secure it with the included velcro strap.
B8. Run the longer extension cable along the U-shaped grip bar of the Veloped and secure it with the included velcro strap.
You can cut the excessive length of the velcro strap with a pair of scissors.
B9. You can cut the excessive length of the velcro strap with a pair of scissors.
Place the battery pack in the rear zippered pocket of the basket.
B10. Place the battery pack in the rear zippered pocket of the basket.

The package contains

The package contains

How to operate the light

How to operate the light

Customer Reviews

Be the first to post a review for this product

General FAQ

Relevant Guides

Search help

Also Purchased Products

Product Reviews    

  • Mimi (Ward)…

    I am so pleased with my Walker. I have used it every single day as I cannot walk without its help! Before I struggled along with two sticks.

    Me and Louis (my beautiful whippet) go out twice every day on our walks with your wonderful product.

  • Perfect…

    I bought this rollator for my mother. She is very happy with it and it gives her the confidence she needs. She can walk on her own whenever she wants without the fear of falling. The Veloped is perfect for country paths and roads. It looks elegant a…

  • My Veloped arrived on time and in……

    My Veloped arrived on time and in perfect condition, well packaged and easy to assemble. I am thrilled with it, makes walking so much easier and more comfortable than my old Walker. The company are friendly, efficient and made the whole ordering and …

  • The best outdoor rollator on the market…

    The admittedly high expectations of the Veloped (see previous reviews) were easily fulfilled. No other rollator I know is as stable, safe and reliable as the Veloped and so qualified for use in the countryside, woods and forests.
    However, the high s…

  • The best walker out there…

    I have tried the conventional walkers, but none of them compares to the Trionic Walker. This is by far the best in the market; glides over all terrains with the greatest of ease. I would and have recommended this item to all my friends. Thank you so …

  • I am happy…

    I am still practising. It works quite well on both paved and unpaved paths. I'm happy to have it, because it is safe.…

  • My travel walker…

    I bought the Trionic Veloped a few years ago for the outdoor use, specifically to walk my dog over rough terrain. After my dog and I got a bit older (almost 15 and 70 years old), I also bought the Walker 9er to be used indoors and as a 'travel walker…

  • Also suitable for gardening…

    I am delighted with my new rollator. With this support, I can finally pursue my beloved gardening.…

  • Don't think about it, get it.…

    I have used the Tour now for a couple of weeks. Am absolutely amazed at the difference it makes to walking. Have been using a standard 4-wheel walker and walking was very limited. After about a hundred yards or so the pain in my back was such that I …

Subscribe to our newsletter!